Why Customize Barcode Label Templates?
Label templates give you full control over how your printed labels look. With this tool, you can:
- Design labels with your Ecwid SKU, product name, price, brand and more.
- Use the right label size and layout to match your printer (thermal roll, sheet, or inkjet).
- Include your store name, website or branding text, making your labels not just functional but also on-brand.
- Generate accurate, scannable barcodes, tailored in size and style for your needs.
Managing Labels
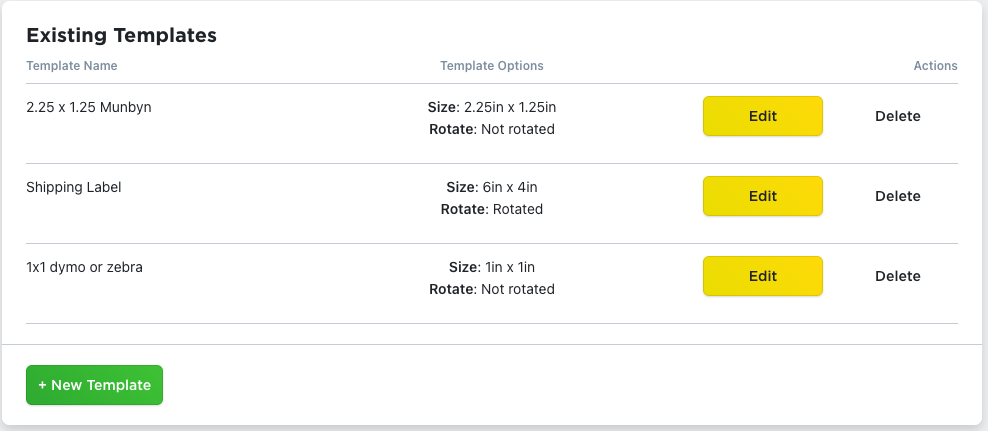
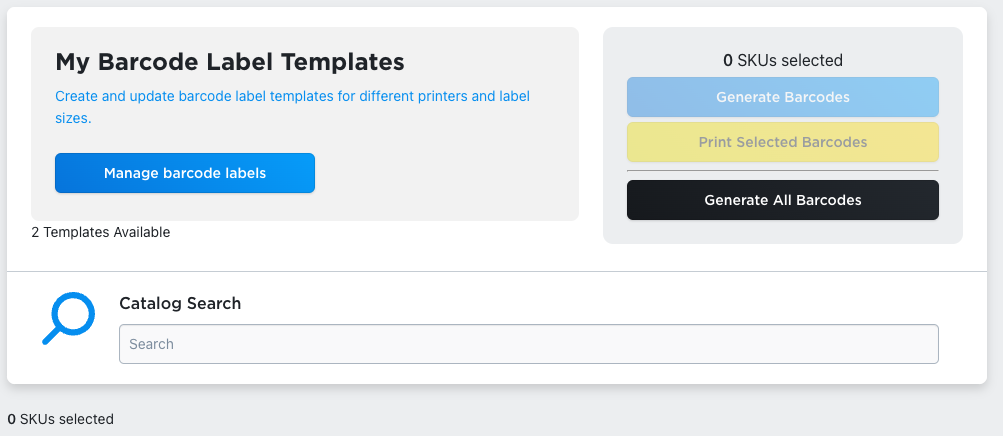
When you click on the “Manage barcode labels” button, you should see a list of your existing barcode label templates. You’ll have options to edit or delete any existing templates, or you can create a new template.
Creating New Labels
Label Layout
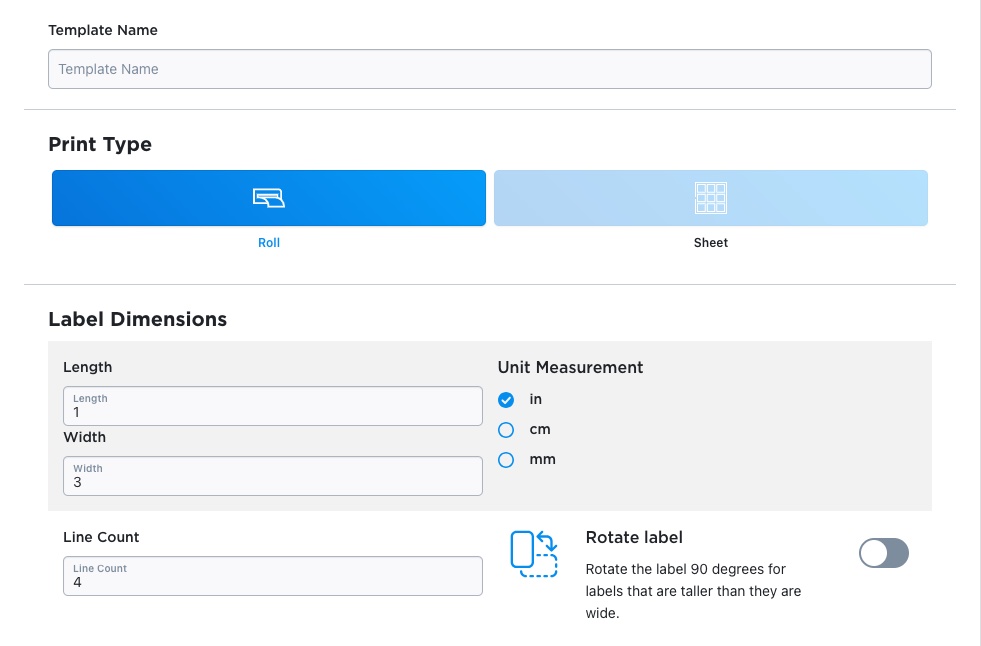
When creating a new barcode label, you’ll need to set a few options. After naming the template, you can set a number of layout options for how the template is set up. Your first options will be to define the size of the labels being used, including information on the units of measurement for the length and width. You’ll then have options for the number of lines of text/barcode to be used in the template, and you’ll have an option for whether the template needs to be rotated to accommodate labels that are longer than they are wide.
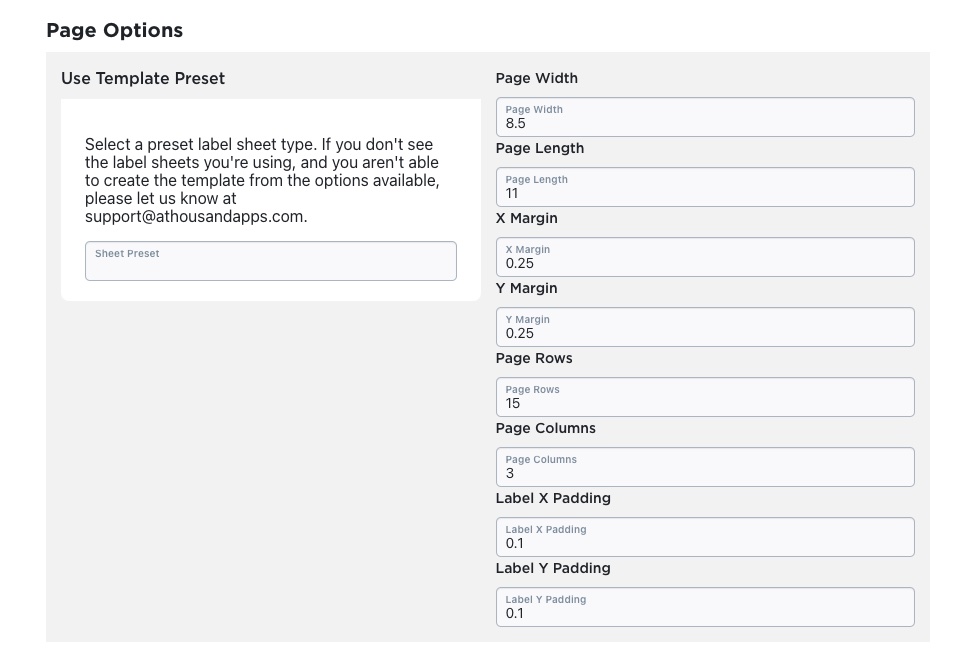
If you’re looking to print a sheet of labels from a laser or inkjet printer, choose the Sheet print type. You’ll be presented with a number of additional options for defining the setup for a page of labels. If you select a page type from the Sheet Preset dropdown, the values for the page and the label dimensions should update to match the sheet type selected.
If the type of label sheet being used isn’t in the dropdown, you can manually set the values to define the sheet. See this page for definitions for each page option.
Barcode Row

The next set of options define how the barcode line appears. The barcode line is enabled by default, but if you wish to print labels without a barcode, you can disable it. The barcode will take up the entire line of whichever line is selected from the line dropdown. The barcode’s height is set as a percent of the entire label’s height in the last option.
Label Parts
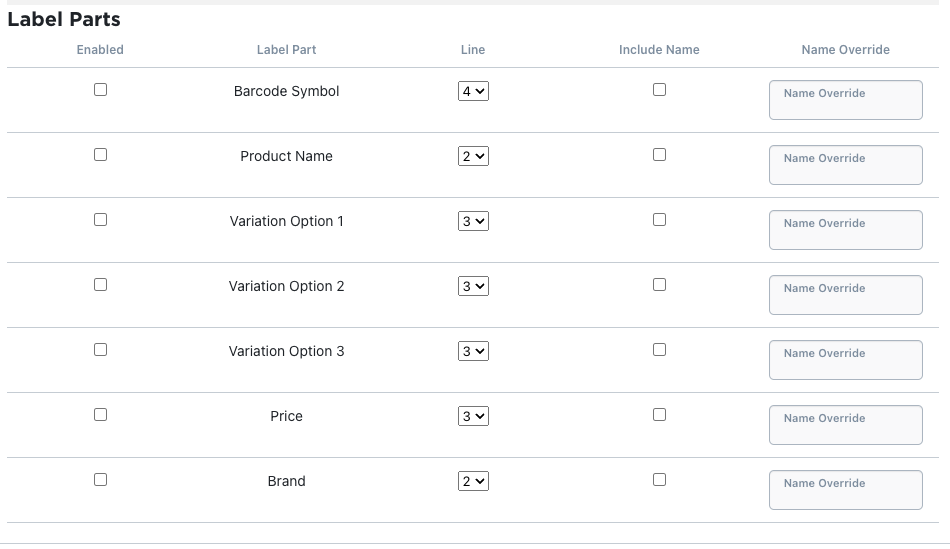
The Label Parts section sets other text to appear on labels generated for this template. Each option can be enabled or disabled, needs to have a line that it appears on (as long as the barcode isn’t set on that line). Additionally, you’ll be able to set whether or not a label part will include its name before it, and if that name should be overridden to manually set the text for the part’s name.
The SKU options as selected appear in the same order that they appear in Ecwid. If the name option is selected for any of these SKU options, the name used will be the name of the option, unless overridden. Other default values are as follows:
| Label Part | Default Name |
| Barcode Symbol | Barcode |
| Product Name | Product |
| Price | Price |
| Brand | Brand |
Store Branding
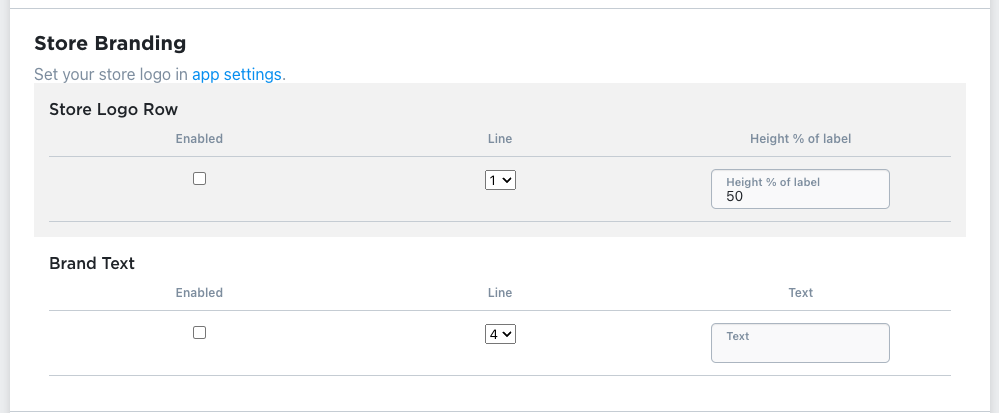
There are two additional options for branding labels. The first branding option is to have a store logo row. The row is similar to a barcode row, where no text will appear on the row, but will just be an image of your store’s logo. The size of the logo is based on a percentage of the total height of the label.
You can set your store’s logo in the app’s settings.
The other branding option is to include some branding text. This text will appear the same on all labels. You can use this value to include a short message for customers, to include a url for your store, or anything else that would be helpful for your products.
Line Settings
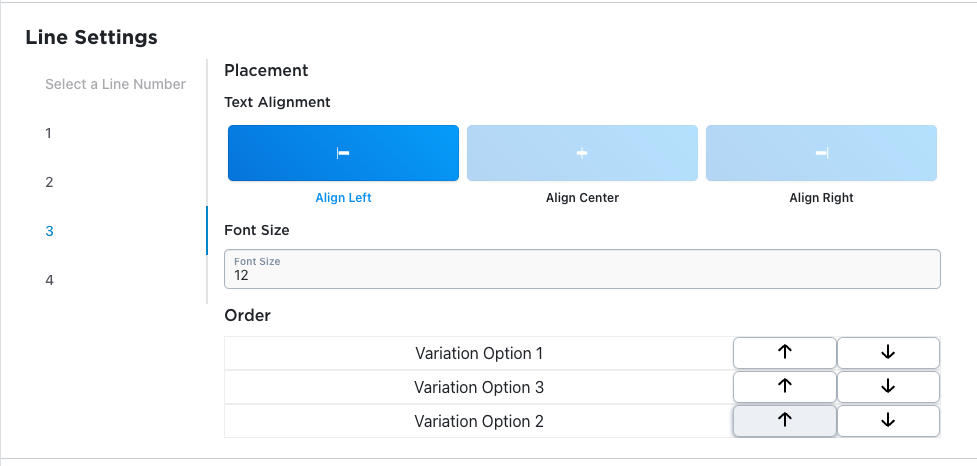
The next section deals with options for each line. After selecting a line from the line numbers on the left, you’ll see options to align the text, setting the font size and setting the order of the label parts on the selected line. Click on the up or down arrows to move the label parts further left or right.
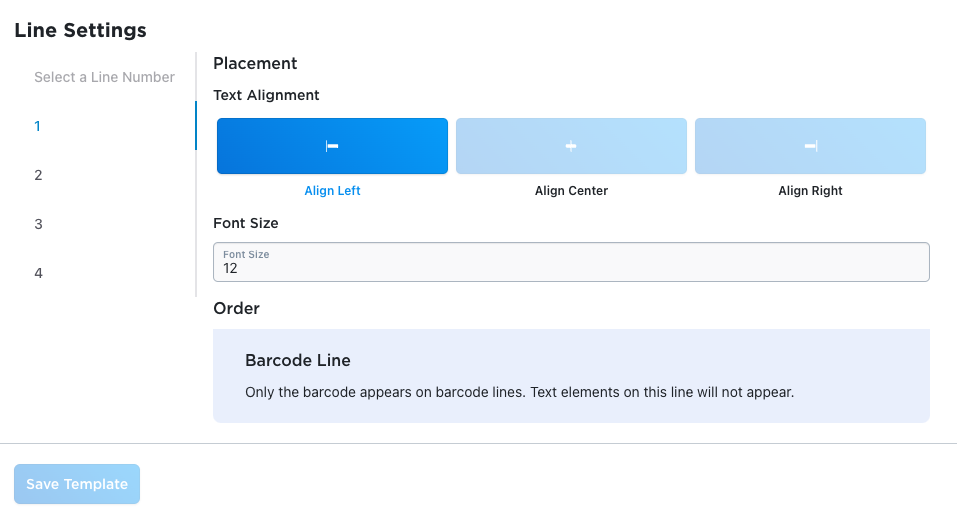
If there are special circumstances on the line (where nothing can be reordered, or the line is the barcode’s line) a different message will appear in the Order section. If you’ve named the template and selected the options you’re looking for, you should be able to save the template by clicking the Save Template button.
Preview
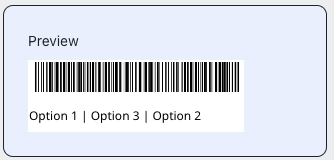
As changes get made, you should see a preview of your barcode appear below the page notes on the left side of the page.
Editing Labels
Editing labels is very similar to creating a new label, but the form will come pre-populated with the existing label template’s settings.
Printing Labels
Check out the catalog search and label printing section for using barcode labels.
Best Practices & Tips
- Name templates clearly so it’s easy for your team to choose the right label (e.g., “Small Thermal – SKU only”, “Avery 4153 – Name + Price”).
- Include useful product info: SKU and name are often most valuable on labels; price or brand can be helpful too.
- Test before a full print run: Always preview and print a test sheet or roll to check alignment and data.
- Use your branding smartly: Add your store’s name or your URL to reinforce your identity, without overwhelming the label.

Barcode Inventory Management for Ecwid by Lightspeed
Barcode Inventory Management can help you manage your store’s inventory. Try now, and get a 7 day free trial!
Hopefully this article has inspired you to make improvements to your inventory management systems. If you’re interested in reading more, check out our blog here, or try out the apps today. The Shopify, Ecwid by Lightspeed and BigCommerce versions of the app come with a 1 week free trial, so you can test them out, hassle free!
If you have any questions about A Thousand App’s apps, please reach out to us at support@athousandapps.com and we’ll happily address any concerns you have!