
The Surprise Box Inventory Problem
Ecwid starts you out with inventory tracking that is good for 99%+ situations. However, if you have surprise boxes (or maybe you call them mystery boxes or grab bags, etc.), you probably know that there is a gap in Ecwid’s inventory management when it comes to surprise box inventory.
Surprise boxes are a product in an ecommerce store where a customer will receive randomly selected items from the store. These boxes can be a great deal for your customers, and lets you move inventory that might be building up. Surprise boxes aren’t so great because Ecwid doesn’t know what’s being sold. If you have surprise boxes, inventory management will need to be done manually.
Manual Inventory Control
Manually controlling your store’s inventory isn’t such a big problem if your store only has a few orders. As your store grows you’ll soon run into the core problem with surprise boxes: the inventory available in your store isn’t the same as what you see in your warehouse.
It would be great if you could pick items just based on what you see in your warehouse. In a busy store, you’ll quickly realize that the number of any item you see on your shelves is higher than the number that’s actually available. Your on-shelf inventory isn’t the number of items you have available in your store. It’s that, plus the number of sold items that haven’t been picked and shipped yet.
If you’re manually putting together surprise boxes, for each item in the box, you probably waste a lot of time:
- Looking at items on your shelves
- Looking up those items in your store
- Modifying your inventory one item at a time
If you want to take back that time and increase the accuracy of your picks, Barcode Inventory Management can help.

This article is about the Barcode Inventory Management app for Ecwid by Lightspeed. The Barcode Inventory Management for BigCommerce app and the ScanWay for Shopify app have equivalent tools for everything mentioned in this article. If you’re using BigCommerce or Shopify, you may wish to read on as well!
Barcodes and Live Inventory Modification
To solve this problem, we can use two tools from the Barcode Inventory Management app. Unless your store has a barcode system in place, we can start with the Manage and Print Barcode Labels tool. Once that’s set up, use the Live Inventory Modification tool to scan, check and modify product and variation inventories. The tool makes changes instantly, so everything is done on the fly!
Setting up SKUs
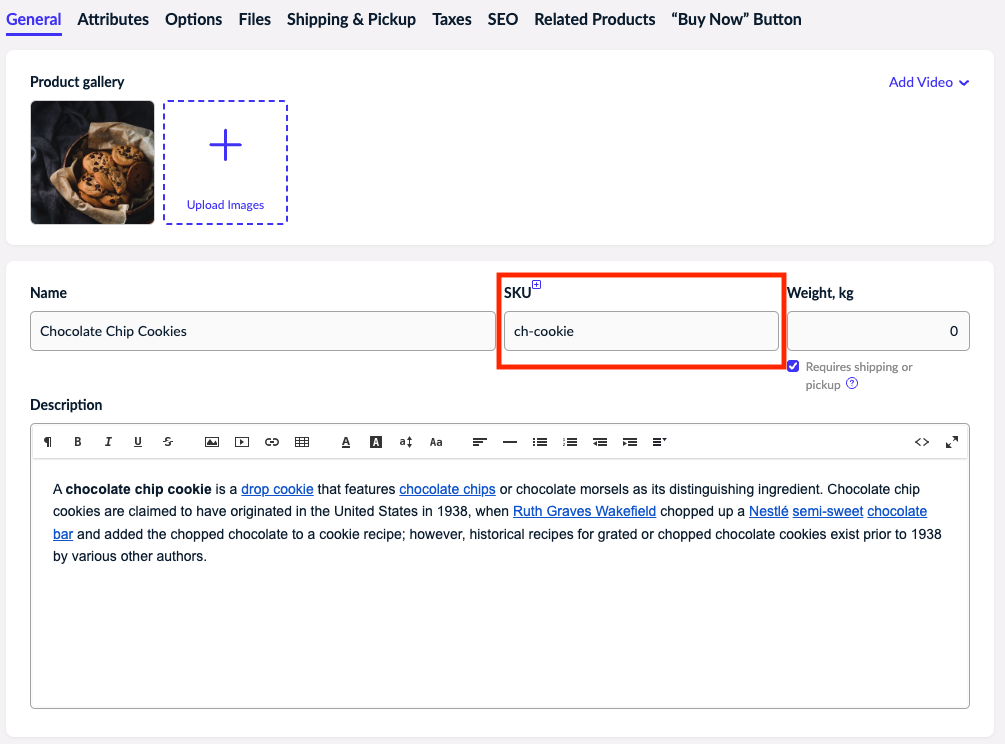
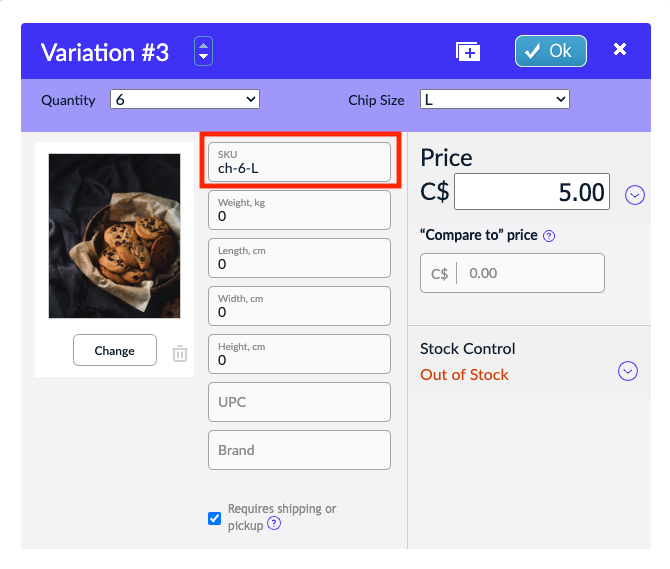
If you need it, the Manage and Print Barcode Labels tool can help you set up a simple barcode system. Begin by assigning unique SKUs to each of your products or variations that are stored in your warehouse. The barcodes generated by the app generates are based on those SKUs.
There are a lot of different ways to choose SKUs. As long as they’re unique, and under about 16 characters long, you shouldn’t have and problems using them on labels. The app will take the first item Ecwid returns when it searches for a SKU. Having duplicate SKUs can result in some unexpected results. SKUs should be unique!
Setting up barcodes
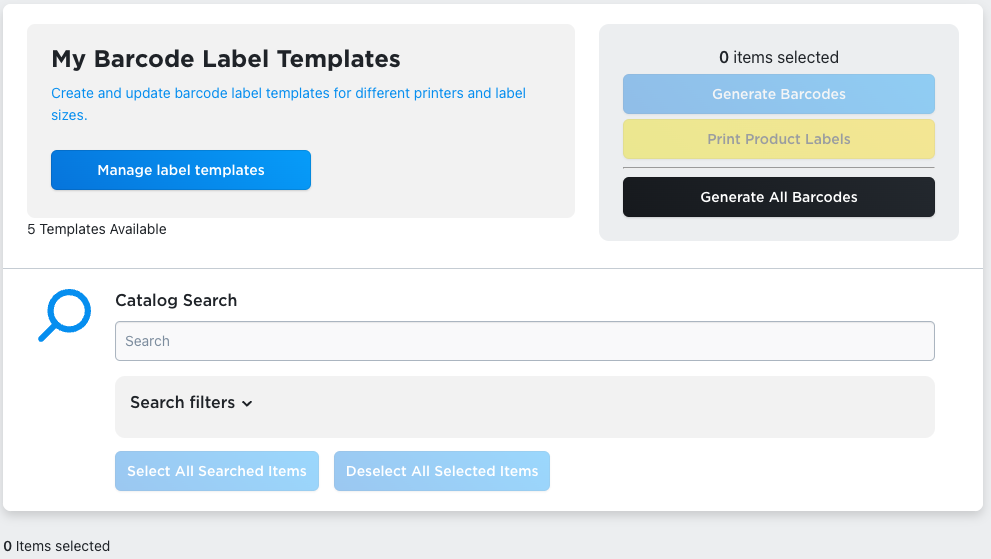
Once you have your SKUs set up, we can start using the Manage and Print Barcode Labels tool. In order to get barcodes on labels, we first need to generate barcodes, based on our SKUs.
The tool will present a few different options for you. You can just click the Generate All Barcodes button on the right side of the screen. The app would then go through every product and variation, and generate barcodes for everything with a SKU. That could take a while, so if you’re only going to be bringing on a few items, it might be quicker to look down below and generate barcodes for the SKUs we’re interested in right now.
To only generate a few barcodes, do a search in the Catalog Search bar at the bottom of the screen. Search results will appear in a list below. Select the ones you want by clicking on the checkbox on the left side of the results. Once you have everything you’re interested in selected, click on the Generate Barcodes button, and your barcodes will be generated.
With either selection, you should get a message about any generating work being done. After this work completes, your barcodes will be generated. Once generated, you should see some new options in the searched rows:
- A little barcode button to download an image of the barcode
- A button to preview how that barcode will look in any templates you have generated
If you don’t have any templates yet, don’t worry, we’ll take a look at setting up templates next.
Setting up label templates
Next, we need to print labels for the barcodes we’ve generated for our warehouse. The first thing we’ll have to do is pick labels that are going to work for our warehouse. There’s a few things to consider here:
- Where are these labels going to go?
- How much information do we need to squeeze onto them?
- Do I have a printer that will print that size?
Label Locations
For setting up a warehouse, you’ll probably want these labels to be printed and placed right next to the products they represent. You can put labels directly on shelf faces by the inventory the labels represent. You can put labels on pegboard inventory hangers. For especially small items, you might need to have labels printed out on a standard sheet of paper in the same orientation that items are stored in small containers, above those containers. These are all factors in deciding how large your labels can be.
Information Needed
We’ll then need to consider what information needs to be included on the labels. Is a product name enough? Do you need to include the item’s price, or the values of different variation options on items? Do we need to see the SKU itself on the label? We’ll be able to see how these things fit into our labels before they’re printed, but the more information we need, the larger we’ll probably need to make the labels.
Technical Specs
Lastly, we need to check what labels we can print on, based on the printer we’re using. Some printers might have restrictions to branded labels, specifically made for their brand. Some may have limitations to the size of labels they’ll print, or if they’ll only print from rolls or stacks of labels.
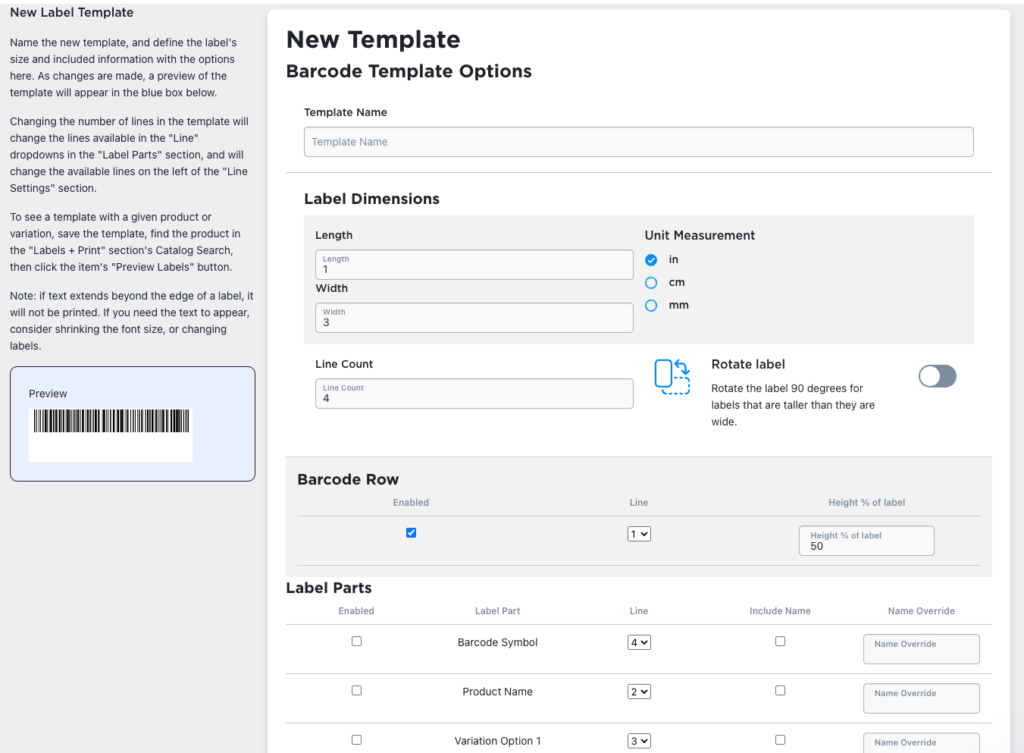
Using Labels and Barcodes
Once you know the size of labels you want to use, and you have the information you know you want to put on those labels, use the label management section of the app to create your templates. You can always see previews of the labels you’re designing as a check to make sure they’re coming out as expected. You can save your label template along the way and check out how it looks with a specific product or variation in that item’s preview area, just to be sure everything is going to fit.
Alternatives
We also shouldn’t get caught up thinking that the only way to print is from the Barcode Inventory Management app’s printing area. If you need to print on standard sheets of paper, or we need to print on labels that aren’t rectangular, you can always download the barcodes or labels individually and use them in whatever other software you need to get exactly the labels you want. The barcodes should still be readable, as long as they aren’t modified or scaled incorrectly. In fact, any code128 barcode from any source should be usable, as long as your barcode reader can read it!
Once you have your label templates made, we can go back to the Catalog Search again, find and select the items that we’re looking to print labels for, just like we did when selecting items to generate barcodes for. This time, however, we’re going to click on the Print Product Labels button to get to the printing tool, so we can print our labels.
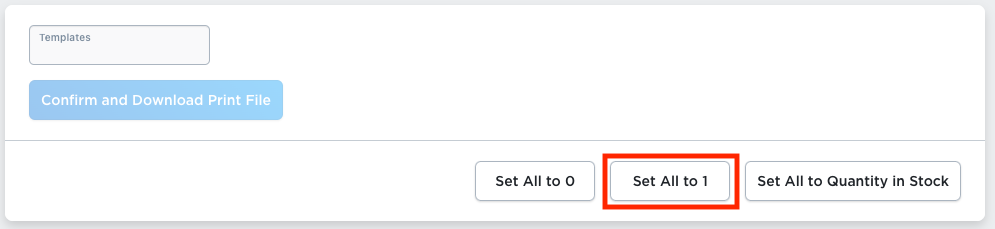
On the print page, we probably want to click the Set All to 1 button, to get a pdf file with one label of each item. If we need more than one, we can click on any item we need more for and set the quantity we need to get printed. After selecting our template, we can click the Confirm and Download Print File button, and we’ll get a file that can be printed from your label printer, and we’re ready to stick those labels in place by our items.
Please ensure your browser allows popups for this page when downloading your print file. The download may otherwise be blocked!
Scanning and picking products
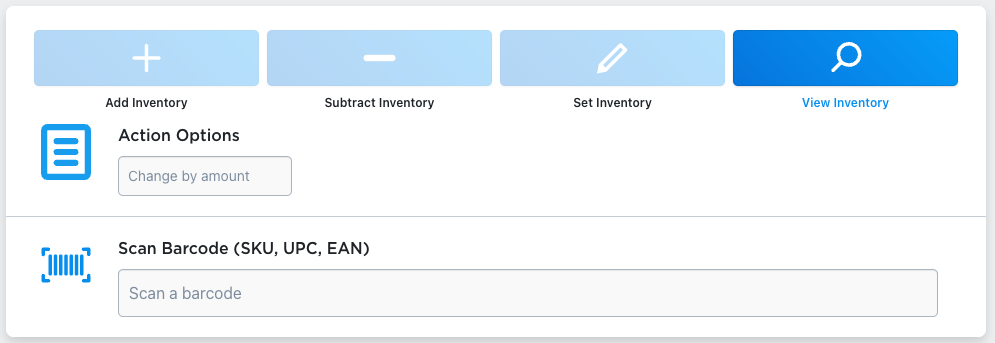
Now that we have our warehouse set up with barcode labels representing the products in our warehouse, we can now start using them to build our surprise boxes with ease! When we need to pick an order that has a surprise box in it, we can go into the Live Inventory Modification tool, and immediately tell how much inventory we have available (instead of inventory on shelf) by selecting the View Inventory button, and scanning items we think might work. From the resulting row, we’ll be able to tell exactly how much inventory we have that’s still actually available.
When we find something good, we can switch over to the Subtract Inventory button, put in a Change By Amount of 1, click back into the Scan a barcode bar, and scan that item’s barcode. We should immediately see that item’s inventory reduced, and that item should now be ready to ship – no more guessing, no more going through Ecwid’s UI to search and manually modify inventories.

Barcode Inventory Management for Ecwid by Lightspeed
Barcode Inventory Management can help you manage your store’s inventory. Try now, and get a 7 day free trial!
Hopefully this article has given you the information you need to effectively ship surprise boxes and helps you reduce your shipping errors. If you have any questions, or if the instructions don’t quite work for your use case, please reach out to our support email (support@athousandapps.com) and we’ll take a look and see if we can use any of the tools in the app to meet your needs, or if we can add some features to get things working for you. We’re always looking for feedback, and we want this app to be the best it can be!