
Why Use Live Inventory Modification?
The Live Inventory Modification feature allows you to quickly adjust stock levels for individual items in real time by scanning their barcodes. This tool is ideal for:
- Fixing small inventory discrepancies during cycle counts
- Correcting wrong counts immediately, without waiting for batch updates
- Making instant inventory adjustments while you have physical access to products
- Removing for-sale inventory in cases where inventory is also used to create other products (like a crafts store that also sells completed crafts) or services (like an automotive shop that also sells parts)
Because this happens live, you get real-time accuracy in your store and eliminate delays associated with batch upload workflows.
Inventory Modification Options

You can select which action you’re looking to perform on a scanned item by selecting the option from the section at the top of the screen. The adding and subtracting inventory options change the items’ quantity in stock by the quantity listed in the Action Option’s “Change by amount” field. The “Set Inventory” option will set a scanned item’s quantity in stock to the value in the “Change by amount” field, while the “View Inventory” option doesn’t use the “Change by amount” field, and instead will simply read the inventory of the item related to a scanned SKU.
Scanning Barcodes
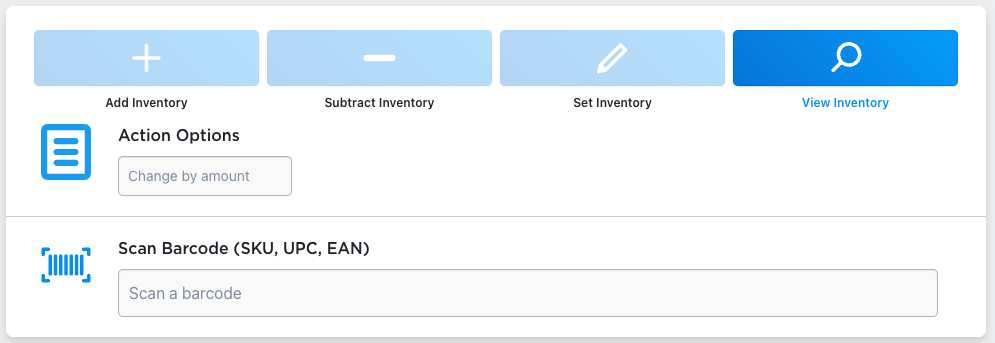
Once you’ve picked the option you’re looking for, and you’ve entered the amount you’re looking to change an item’s inventory by (if applicable), you should click on the “Scan Barcode” input field to begin scanning. Any item that is scanned will search both the SKU field on products and variations, as well as the UPC field for both (which can contain and type of barcode information including UPC, EAN and ISBN).
Session Options
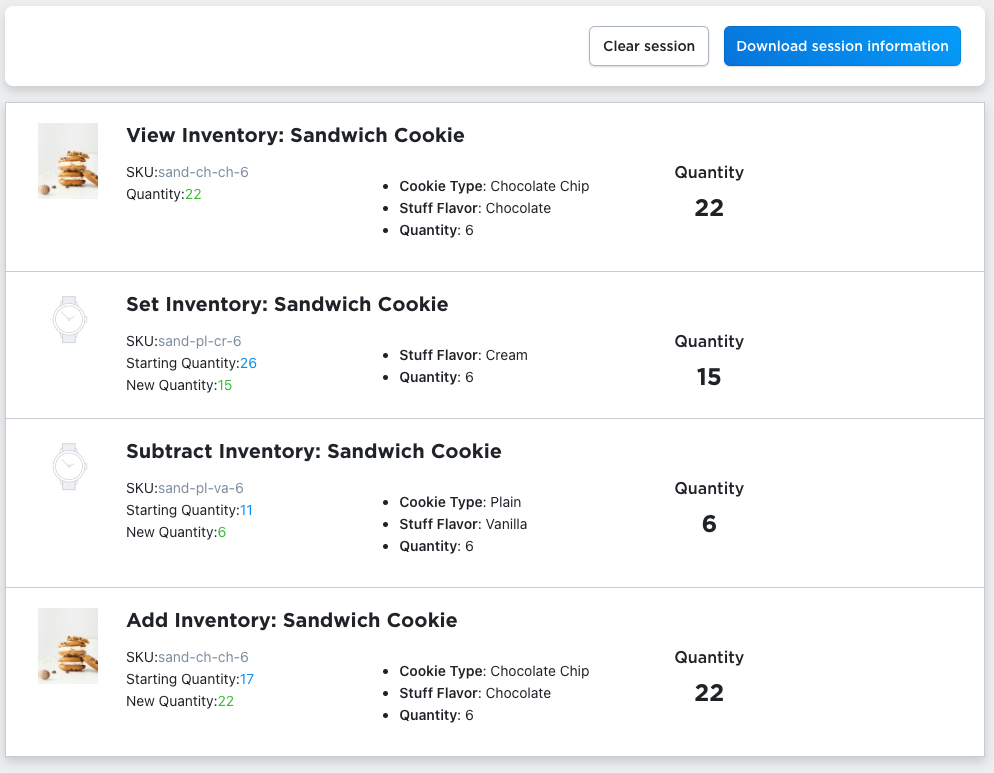
As items get scanned, the items will appear in the session information below. Depending on what action was taken, some slightly different information will appear. In all cases, the product’s SKU will appear, and the SKU’s specific variation options will appear (or a message saying that the SKU was related to a product). For adding, subtracting and setting inventory, you’ll see both a starting and new quantity showing the quantity of the item in stock before the change, and after. You’ll also get a “Quantity” value on the right side – for any of the changing actions that value is the quantity in stock after the change, and for the view action that is just the quantity in stock.
You can download the results of your current session by clicking the “Download sesssion information” button where you’ll get information about all the actions taken in the current session. If you need to clear the session, you can also click the “Clear session” button and the form will be cleared.
Best Practices & Use Cases
- Train your team: Make sure staff understand how to scan, interpret on-hand counts, and apply accurate modifications.
- Verify barcode-SKU alignment: Confirm that scanned barcodes match the correct product SKUs, UPCs or EANs in your catalog, otherwise the tool won’t find the right item.
- Limit large adjustments: While live mode is great for small fixes, use batch tools for wide-scale inventory changes.
- Review difference logs: Regularly export or review modification logs to spot trends in inventory discrepancies.

Barcode Inventory Management for Ecwid by Lightspeed
Barcode Inventory Management can help you manage your store’s inventory. Try now, and get a 7 day free trial!
Hopefully this article has inspired you to make improvements to your inventory management systems. If you’re interested in reading more, check out our blog here, or try out the apps today. The Shopify, Ecwid by Lightspeed and BigCommerce versions of the app come with a 1 week free trial, so you can test them out, hassle free!
If you have any questions about A Thousand App’s apps, please reach out to us at support@athousandapps.com and we’ll happily address any concerns you have!