

The Barcode Inventory Management app makes it fast and accurate to add inventory to your Ecwid store by scanning product barcodes. Whether you’re receiving new stock, counting inventory, or correcting quantities, this tool helps you update stock levels without manually editing product inventories in Ecwid.
Why Use the Bulk Add Inventory Tool?
Using the Add Inventory tool lets you:
- Increase inventory counts by scanning barcodes instead of editing product pages one by one.
- Ensure accurate stock adjustments, even when managing large quantities.
- Update multiple products at once before submitting all changes to Ecwid.
- Speed up warehouse receiving and reduce entry errors.
This workflow is ideal for restocking, receiving new shipments, or correcting inventory discrepancies.
Scanning Barcodes

To begin scanning, click in the “Scan Barcode” input area. Any item scanned should result in a scanned item below. The barcodes being scanned to not need to come from the generated barcodes from the barcodes and label management tool included with this app. Barcodes can be any code that is readable by your scanner – the scanned symbol will appear temporarily in the “Scan Barcode” input area after it is scanned.
The scanned values will be matched with your store’s product and variation SKU values, as well as their related UPC values. The UPC field can be set to any code value, including EAN or ISBN values, and they should scan correctly.
Adding Notes

If you have additional information that is relevant to a batch update, you can include these notes in the “Add Notes” field. For adding products, this could be something along the lines of a manufacturing run completing, receiving products from a supplier or a delivery from a delivery company. You can also include additional details about where to find additional details about the added products or products that failed to be added (e.g. products that didn’t pass quality control, delivered products that came damaged, etc.)
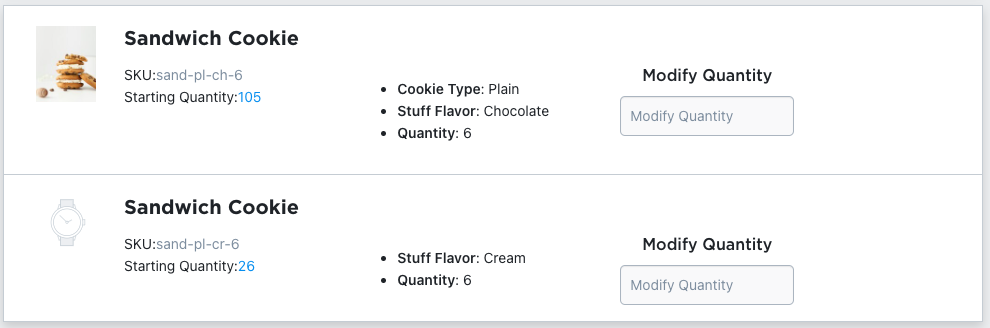
When an item is scanned, it will appear below the notes section. In the row that gets added, you’ll be able to see some information about what was scanned, and you’ll get a field to determine how many additional items need to be added to that item’s inventory. In the information you see, you should see the item’s SKU, the starting quantity (at the time of scanning) and any variation options associated with the SKU.
The “Starting Quantity” field does not update if modifications are made to the item’s inventory while the batch changes form is being filled out. For adding and reducing inventory, the changes are not based on this value. For adding inventory, the addition will be made to whatever inventory exists for the item at the time that the submission is read by Ecwid.
If you have scanned an item and no longer need to modify its inventory, you can leave the field blank and it won’t be included in the batch update.
Other Controls
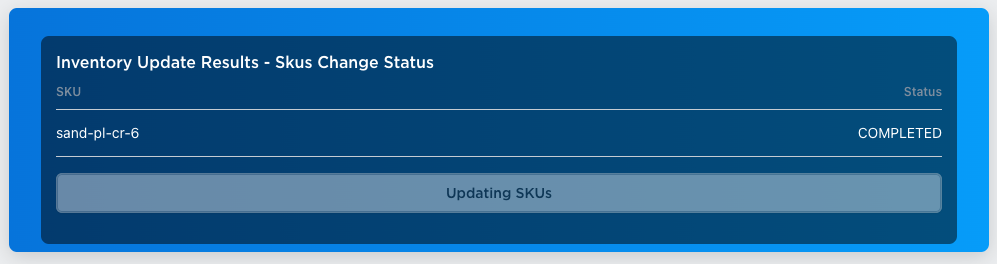
If you’re ready to make the changes described in this form, you can click on the “Submit Changes”. When this button is clicked, the submission will be made to Ecwid, and the UI will begin following the changes as they’re made:
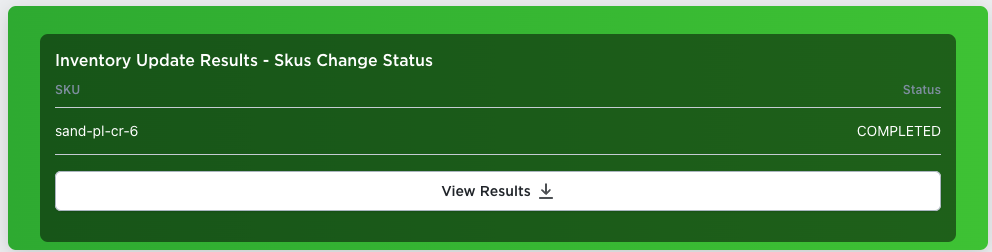
Once the tasks are complete, the UI will be updated, and you’ll see a button with a link to view and download your changes.
If you need to completely clear the form, you can click on the “Clear Session” button and the form will be reset.

Barcode Inventory Management for Ecwid by Lightspeed
Barcode Inventory Management can help you manage your store’s inventory. Try now, and get a 7 day free trial!
Hopefully this article has inspired you to make improvements to your inventory management systems. If you’re interested in reading more, check out our blog here, or try out the apps today. The Shopify, Ecwid by Lightspeed and BigCommerce versions of the app come with a 1 week free trial, so you can test them out, hassle free!
If you have any questions about A Thousand App’s apps, please reach out to us at support@athousandapps.com and we’ll happily address any concerns you have!